 Pin This
 My neighbor showed up at my door with a box of these tiny cheesecakes the week I moved in, and honestly, they changed how I thought about desserts entirely. Something about their size made them feel less like indulgence and more like joy—you could have one, maybe two, without the guilt of committing to a whole slice. That gesture stuck with me, so now whenever someone needs a housewarming gift or I'm hosting, these little bites become my secret weapon for looking like I spent hours in the kitchen when really, they're almost embarrassingly easy.
I made these for a potluck once and watched them disappear in ten minutes while the elaborate cheesecake I'd attempted the year before sat mostly untouched. That's when I realized people don't want showmanship—they want something they can hold in one hand while chatting, that tastes like someone actually cared enough to make it but didn't lose their mind in the process.
Ingredients
- Graham cracker crumbs: Use the kind you buy pre-crushed if you're short on time, or pulse whole crackers in a food processor and you'll actually taste the toasted flavor more.
- Granulated sugar: For both crust and filling—this is your sweetness base, so don't try to swap honey or anything else without expecting different results.
- Unsalted butter, melted: The melted part is non-negotiable because it helps the crust bind, but let it cool slightly or it'll make everything greasy.
- Cream cheese, softened: This is the moment where patience pays off—if it's cold, you'll have lumps no matter how hard you beat it, so pull it out 30 minutes before you start.
- Eggs: Room temperature, really, because cold eggs won't blend smoothly into that cream cheese mixture and you'll feel the grittiness with every bite.
- Sour cream: Adds a subtle tang that keeps these from tasting one-note sweet, and it also keeps them moist even after a day in the fridge.
- Vanilla extract: A full teaspoon matters here because the small size means less filling overall, so every flavor note counts.
- All-purpose flour: Just a tablespoon for structure—it prevents that slight wobble that can happen if you bake them too long trying to get them set.
- Berries, preserves, or chocolate: Your finishing flourish, and honestly the most fun part because you can match them to whatever mood you're in or whatever the occasion calls for.
Tired of Takeout? 🥡
Get 10 meals you can make faster than delivery arrives. Seriously.
One email. No spam. Unsubscribe anytime.
Instructions
- Heat your oven and prep your pan:
- Get that oven to 325°F—not 350, because mini cheesecakes bake fast and you want gentle, even heat so the edges don't overcook while the centers are still thinking about setting. Line your muffin tin with paper liners and have it sitting on the counter ready to go.
- Build your crust base:
- Mix the crumbs, sugar, and warm butter in a bowl until it feels like damp sand, then press about a heaping teaspoon into each liner. You want it firm enough to hold together but not so packed that it becomes a hard shell—there's a sweet spot where it's just snug.
- Smooth out your filling:
- Beat that softened cream cheese until it's completely smooth with no lumps hiding anywhere, then add sugar and cream it together like you're making frosting. This takes a minute or two, and it matters more than you'd think because lumpy filling tastes grainy.
- Add eggs gently:
- Drop in one egg at a time, beating after each one until it's fully incorporated before adding the next. This method helps prevent overmixing, which can make baked cheesecakes crack or weep.
- Finish the filling:
- Stir in the sour cream, vanilla, flour, and salt, mixing just until everything comes together—stop as soon as you don't see streaks of white anymore. Overmixing at this stage introduces air bubbles that'll make your cheesecakes puff and crack in the oven.
- Fill the liners:
- Spoon the filling carefully over each crust until it's nearly at the top of the liner—it'll rise slightly but not dramatically if you've mixed it right. Use an ice cream scoop or two spoons to make this less messy than it sounds.
- Watch them bake:
- Bake for 18 to 20 minutes—they're done when the edges are set and the very center still jiggles slightly when you gently shake the pan. This is the trick that keeps them from drying out, and honestly, ten seconds of overexposure changes everything.
- Cool them down gradually:
- Leave them in the pan for 15 minutes after you turn off the oven, then transfer to a wire rack. This slow temperature drop prevents the cracks that make you feel like you failed even though you didn't.
- Chill for at least an hour:
- The refrigerator is where these little things go from good to absolutely silky—the cold sets everything properly and lets the flavors settle into place. If you make them the night before, even better, because cold cheesecake tastes richer.
 Pin This
 These became my thing at work, the dessert people actually remembered weeks later, which felt strange for something so small and simple. Then someone told me it wasn't really about the taste—it was that I'd shown up with something homemade that didn't feel like a burden, just a genuine kindness wrapped in a paper liner.
Making These Ahead
The beauty of these mini cheesecakes is that they're actually better when you make them at least a day in advance, something I discovered by accident when I prepped them for a Sunday brunch on Friday night. The flavors deepen, the texture becomes more cohesive, and you're already halfway done with setup before your guests even arrive. Store them in an airtight container, covered with plastic wrap so they don't absorb flavors from the fridge, and they'll keep for up to three days without losing quality.
Flavor Twists That Actually Work
The first time I added lemon zest to the filling, I was nervous about overshadowing the cheesecake base, but it turned out to be that perfect little wake-up call that made people pause and actually taste what they were eating. Honey drizzle, a tiny pinch of cinnamon, or even a hint of espresso powder can transform these from plain to memorable without requiring any structural changes—just fold whatever you're trying into the filling before you spoon it into the liners.
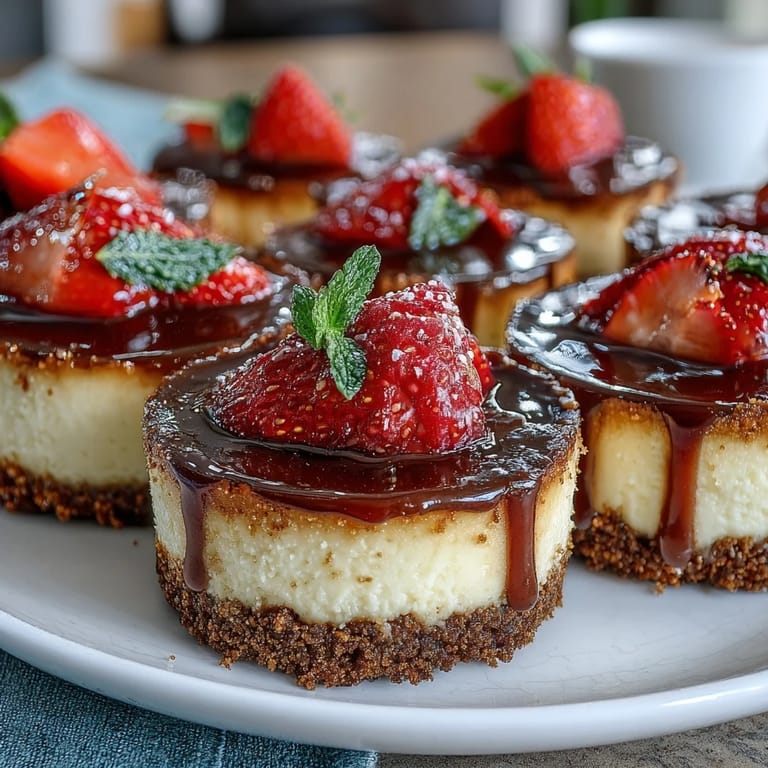
Topping Strategies and Timing
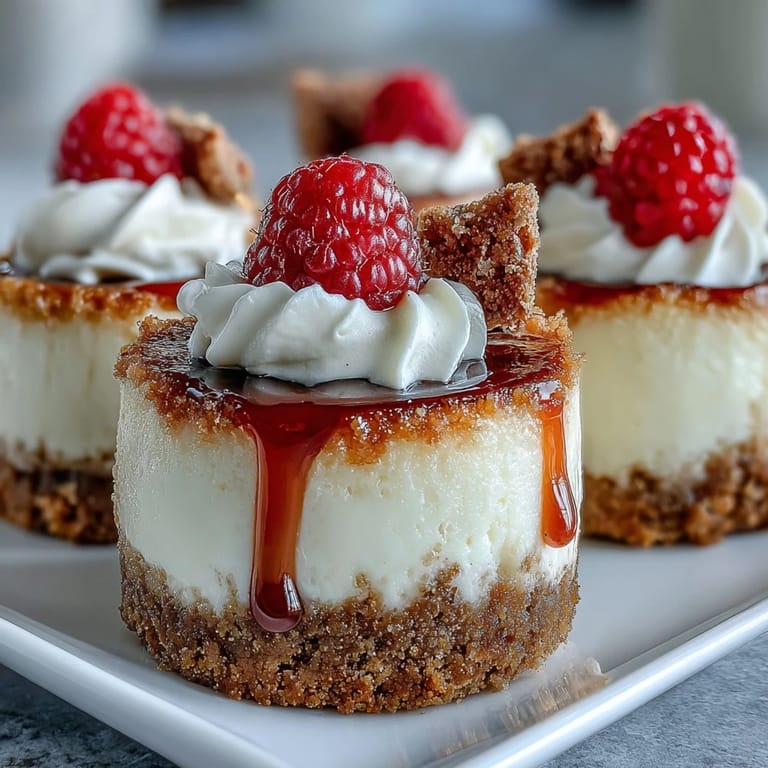
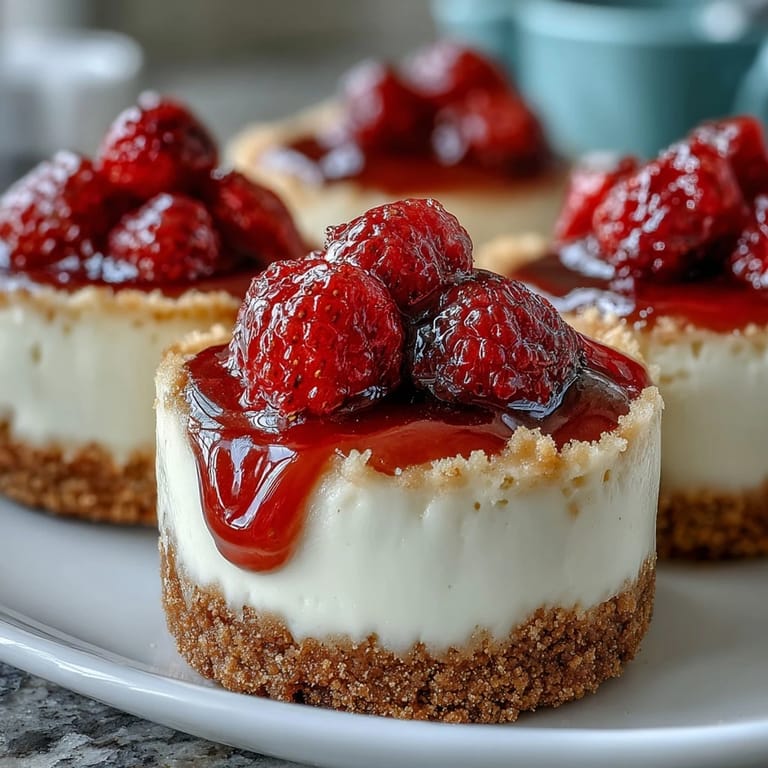
I used to top these cheesecakes right after they cooled, thinking I was being smart, but the toppings would shift and slide around as they settled in the fridge. Now I add them just before serving, which takes two minutes and makes a massive difference in how polished everything looks. Fresh berries work best because they stay bright and add a textural contrast, but fruit preserves work too if you're thinking about this as a make-ahead situation, and whipped cream is the move if someone's about to eat theirs immediately.
- Add fresh toppings within 15 minutes of serving so they stay perky and don't get weighed down by condensation from the cold cheesecake.
- If you're using chocolate shavings, warm a vegetable peeler slightly under hot water before running it over a chocolate bar for the best ribbons.
- Preserve or sauce works fine at cold temperature, but whipped cream should stay in the fridge until the last possible second.
 Pin This
 These tiny cheesecakes have become my answer to almost every casual gathering, and I've never once regretted spending 20 minutes of prep time for something that makes people genuinely happy. They're proof that impressive desserts don't require fussy techniques or weird ingredients—just good timing and confidence that simple, well-made food speaks for itself.
Recipe Questions & Answers
- → What type of crust is used for these mini desserts?
A crunchy graham cracker crust combined with sugar and melted butter forms the base, adding texture and subtle sweetness.
- → How can I ensure the filling sets properly?
Bake at 325°F until centers are just set but slightly jiggly, then chill thoroughly to achieve a creamy, firm texture.
- → Can these be prepared in advance?
Yes, they can be made a day ahead and refrigerated, allowing flavors to meld and making serving easy.
- → Are there any tips for adding extra flavor?
Incorporate lemon zest into the filling for a fresh, citrusy note that brightens the creamy base.
- → What toppings complement these mini bites best?
Fresh berries, fruit preserves, whipped cream, or chocolate shavings offer delightful finishing touches and enhanced flavor contrast.